⚠️ Usage Modes – Read Before Using
This plugin supports two modes, and setup/implementation may differ depending on the mode. These differences will be clearly annotated in the documentation as GAS or Generic use cases:
Choose the mode that best fits your project setup.- GAS Mode (Recommended):
✅ Works well with Gameplay Ability System
✅ Full feature support
✅ Built-in replication via GAS
- Generic Mode:
✅ Full feature support
❌ No replication support – manual replication is required if needed
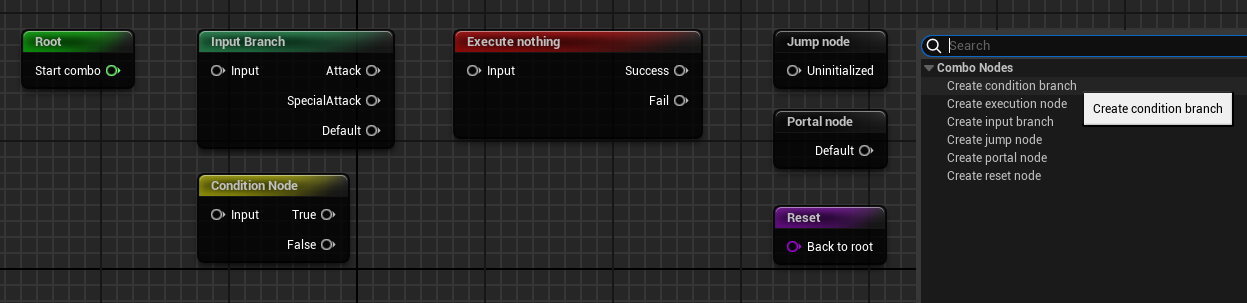
Node Types
Root Node
Root node is the starting point of the graph. When the graph resets, it returns to this node.
Execution Node
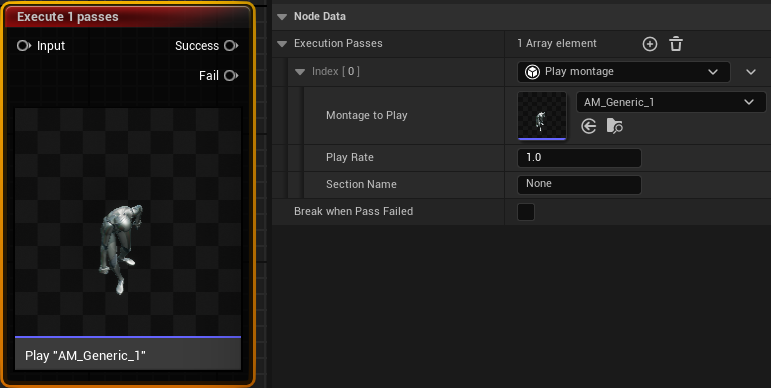
Used to perform actions, such as playing animations, consuming mana, or triggering gameplay effects.
- Each Execution Node can contain multiple Action Passes.
- Passes are executed from top to bottom.
- If any pass fails, execution stops and follows the
Failoutput pin.
Creating a Custom Action Pass
Create a custom Action Pass by inheriting from UComboActionPass.
Examples:
- C++:
UComboActionPass_PlayMontage - Blueprint:
CAP_Generic_Attack
Tip:
CAPstands for Combo Action Pass. It’s a useful prefix for filtering in the editor.
Condition Branch
Acts like an IF statement. The node will evaluates one or more Condition Passes using logical operators (e.g., AND, OR) and determines which path to take.
Creating a Custom Condition Pass
Create a custom Condition Pass by inheriting from UComboConditionPass.
Examples:
- C++:
UComboConditionPass_EnoughStat - Blueprint:
CCP_ConditionExample
Tip:
CCPstands for Combo Condition Pass.
⚠️ Condition Passes must only call
constfunctions. They should not change game state. If you need to change state or trigger events, use an Execution Node instead.
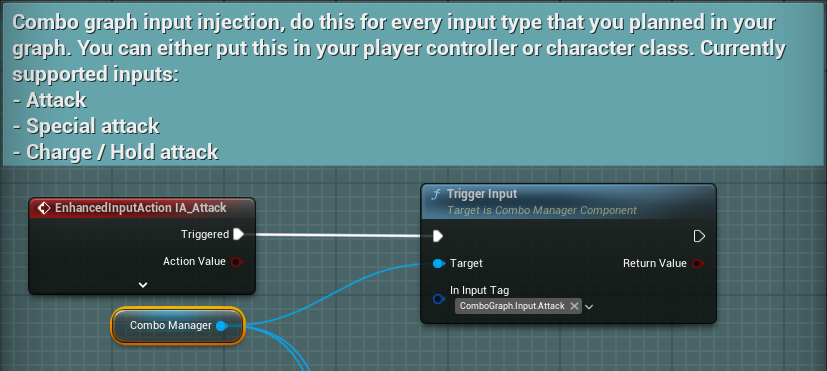
Input Node
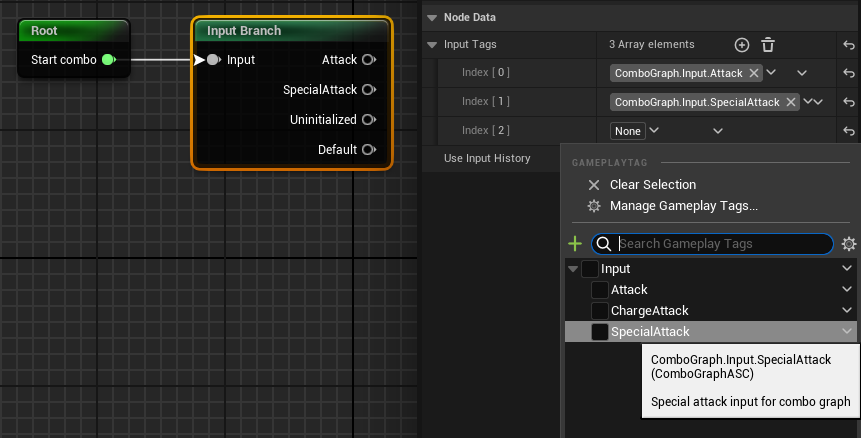
Waits for a specific player input before continuing the combo.
You define input types using Gameplay Tags and can integrate with the Enhanced Input System for more advanced input handling.
How to Create a New Input
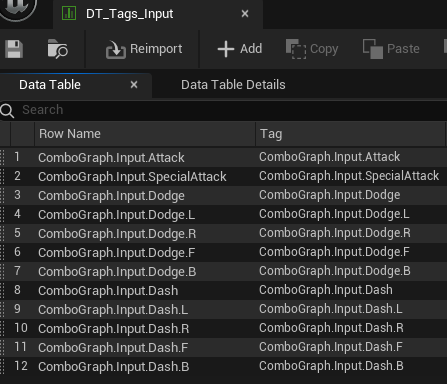
Define a GameplayTag that starts with
ComboGraph.Input, e.g.,ComboGraph.Input.HeavyAttack.
You can manage your tags in a DataTable usingFGameplayTagTableRow.Create an Input Action if you’re using the Enhanced Input System. (If you are not using Enhanced Input System, then you can skip this step)
In your
PlayerControllerorCharacter, bind the input event and trigger the combo graph using the tag you defined.
- For more advanced control, you can add direction to the tag.
Example:ComboGraph.Input.HeavyAttack.Bcan represent a backward heavy attack.
This will match input nodes withComboGraph.Input.HeavyAttack.Bor its parentComboGraph.Input.HeavyAttack.
How to use directional input
Reset Node
Resets the graph and returns execution to the Root Node.
Portal / Portal Jump Node
These nodes allow for function-like behavior within the graph.
Use them to simplify complex graphs or to jump to specific locations in the graph based on gameplay logic.
How to Use
- Create a Portal Node and assign it a unique Gameplay Tag.
- Use a Portal Jump Node to jump to that tag.
- If the specified tag doesn’t exist, execution fails and returns to the Root Node.
⚠️ Only one Portal Node per tag is allowed. However, you can have multiple Jump Nodes referencing the same tag.