1. Prepare your ACharacter
Make sure your Character blueprint or C++ has these components added:
AnimationDrivenComponent- For listening data from the animation montage and signaling it to other systems (such as gameplay abilities)ComboManagerComponent- For managing combo graph
For GAS users
Make sure your Character has AbilitySystemComponent and it is derived from
UContextAbilitySystemComponentseeComboBasicCharacter.hfor default implementation
For generic users
Add
GameplayTaskscomponent to your Character’s blueprint to use GameplayTask
2. Create a combo graph
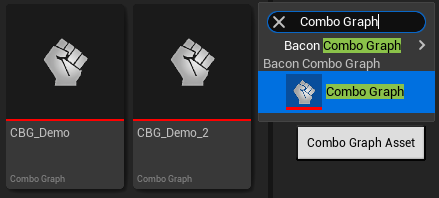
- Create the Combo Graph Asset. This is where Combat Designers mostly works on. You can think of this assets storing a complex combo tree for your game, with multiple branches
and combo options.
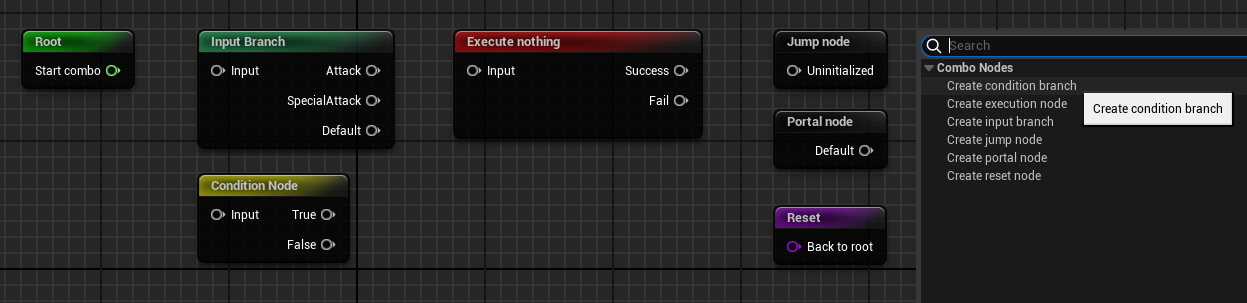
- Right click on the graph, a panel will appear for you to create a new node. For starters, we only need to focus on
Input Branch(green) andExecution(red). More information on other nodes could be found here (Combo Graph Nodes)[] - Create an
Input Branchand connect the Start combo pin from theRootto the Input pin in the Input branch. This will be an entry point for the combo sequence.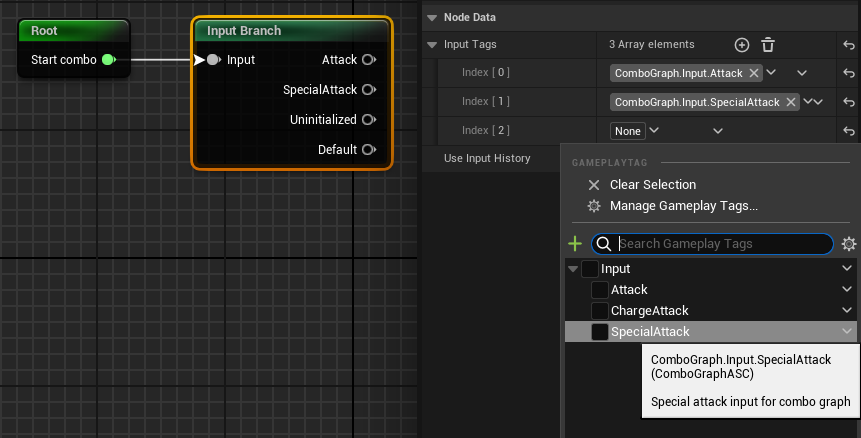
- In order to config for each node, click on the node and look at the Node Data panels on the right. In this case you can specify what input to trigger the next combo move
using Gameplay Tags. By default, I already defined (Attack, Heavy Attack, Charge Attack), you can create as much as you like but it has to begin with
ComboGraph.Input - Create an
Execution Node, connect output pin from the previousInput Branchto the input pin of theExecution Node. - Add a Execution Passes and choose Play Montage, select any montage that you want the character to play
- Repeat from step 4. Each combo requires an
Input Branchnode andExecution Nodenode connected together. For example: Root -> Input -> Execute (combo 1) -> Input -> Execute (combo 2)
3. Setup combo graph on your character
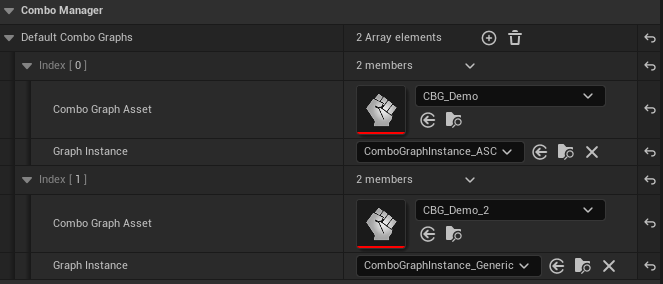
ComboManagerComponent’s setting. Add a default combo graph:
- Select your combo graph asset
- Select your graph instance (if you are GAS users, use
ComboGraphInstance_ASC, it you are generic users, useComboGraphInstance_Generic)
Or you can use GrantComboGraph function to grant a combo graph (works in runtime too)
Tips: You can use this function below to swap combo graph in runtime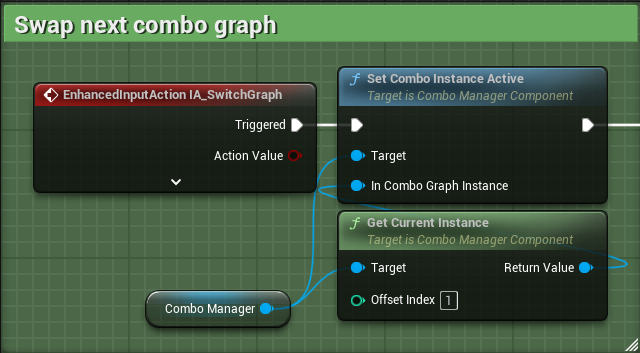
4. Prepare your montage
We use animation driven methodology, so most of the data (static data) can be stored in the animation and it will be send to the system / ability whenever the notify is triggered.
- Open the montage that you used in your Combo Graph
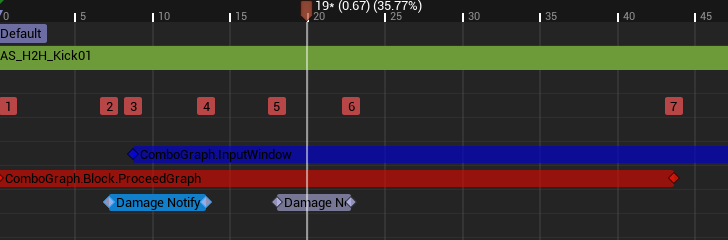
- There are 3 type of Notify States that you need to include in each montage
- Block Proceed Graph: Block the character from performing the next combo (it should be active to the point that you want the player to switch the combo)
- Input Window: When active, it will start receiving player input for the next combo (when input window and block proceed are both active, input will be saved and triggered when block proceed ends)
- Damage Notify: For spawning hitboxes!
- The plugin has provided pre-made notify states for you to plug-in your montage. But choose the correct one for each use cases. For hitbox detection (works both use cases)
ADNS_Damage_LeftFootADNS_Damage_LeftSword- …
For GAS users ANS_GAS_InputWindowANS_GAS_ComboWindow
For generic usersANS_Generic_InputWindowANS_Generic_ComboWindow
5. Implement hitbox and damage
The plugin provide a built-in hitbox collision checking for you and work for both GAS and generic use cases. It can detect if the character hit someone and call function to your damage system to deal damage.
For GAS users
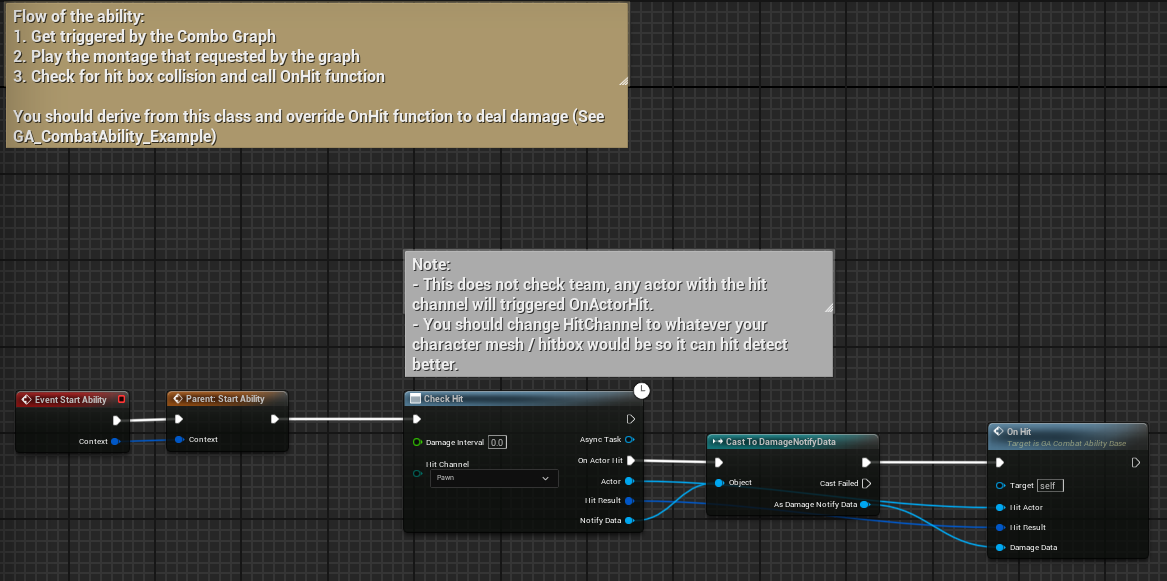
GA_CombatAbility_Base and override the OnHit function for hitbox collision checking.
For generic users
See CBP_BasicComboCharacter - BeginPlay for detailed implementation. It’s the same for GAS users but you will use GameplayTask in your character / component blueprint.